Search this site
121 results found with an empty search
- Take Control of the Flow: Installing a Pool Diverter Valve Like a Pro
Diverter valves are a great choice if you want more control of your water pressure and prefer the option to drain pool water between pieces of filtration and sanitation equipment. This is an especially useful tool when dealing with tough water problems like algae blooms. In this tutorial, The Great Escape walks you through removing an existing fitting and installing a new diverter valve securely between your pump and filter. Key Takeaways: A diverter valve uses three ports to control water flow between your pump, filter, and waste outlet. Always stop water flow from the skimmer and return sides before disconnecting your equipment. Teflon tape helps create a secure connection and prevent minor leaks around threaded fittings. Properly aligning the valve with the pump and the filter port labeled “TO PUMP” is essential for correct installation. A wrench helps securely tighten the fittings before reconnecting the pump and filter with the union nut. Step-by-Step Process: Turn the shut-off valve handles to the side to close water flow from both the skimmer and return sides. If you don’t have shut-off valves, use a Hayward 1022 black cap or rags to temporarily stop water from flowing through the openings. 3. Unscrew the nut on the valve between the pump and filter to separate the two pieces. Remove the existing union, shut-off valve, or old diverter valve and set it aside. Apply Teflon tape to all threaded fittings, using approximately 6–8 rotations without leaving threads exposed. Insert one side of the new diverter valve into the side port of the pump. Insert the opposite side into the filter port labeled “TO PUMP,” allowing the nut to hang loosely over the connection. Use a wrench to tighten both fittings until secure. Tighten the nut on the filter side until the pump and filter connections are firmly joined. Your new diverter valve is installed and ready to use. Resources & Explanations: Diverter Valve — A three-port connector that controls water flow and provides an outlet for diverting water to waste. Teflon Tape — Wraps threaded fittings to help prevent minor leaks that can interfere with water flow. Wrench — Provides the leverage needed to securely tighten the fittings during installation. Hayward 1022 Black Cap — An option for stopping water flow during installation when your pool system does not have shut-off valves. FAQs: Q1: What does a diverter valve do on a pool system? A: A diverter valve gives you greater control over water flow between the pump and filter. Its third capped port can also be opened when you need to divert water to waste. Q2: What does “diverting water to waste” mean? A: Removing the cap from the third port allows water to drain from between the pump and filter instead of continuing through the normal filtration path. Q3: How much Teflon tape should I use? A: Approximately 6–8 rotations, covering the threads without applying so much tape that the fittings become difficult to install. Q4: What if my pool doesn’t have shut-off valves? A: A Hayward 1022 black cap or rags can be used to stop water from pouring through the openings while the existing fitting is removed. Q5: Where should the diverter valve connect to the filter? A: Connect it to the filter port labeled “TO PUMP,” then secure the fittings and tighten the connecting nut firmly into place. At The Great Escape, we want you to feel confident working with your pool equipment and understanding how each component helps your system operate. If you have questions about diverter valves, fittings, or your pool setup, reach out to your local Great Escape team. We’re always happy to help you get the most out of your pool.
- The Ultimate Guide for Attaching a Union
Unions are the silent heroes connecting your pool pump and filter. Whether you're changing your pump or replacing a weathered union, we've got you covered. Follow our step-by-step instructions on detaching the old union and attaching a new one. Key Takeaways: Unions are crucial for connecting two pieces of pool equipment, such as the pump and filter. They might need replacement due to equipment changes or weather-related damages. A wrench and a roll of Teflon tape are essential tools when replacing a union. The wrench makes it easier to detach and attach equipment, while Teflon tape ensures a secure seal on the union's threading. When working with unions, water flow must be halted either using shut-off valves or, in their absence, a Hayward 1022 black cap or rags. Step-by-Step Process: Begin by turning off the water flow from both the skimmer and return side using the shut-off valve handles or a black cap. Next, unscrew the nut located on the union between the pump and the filter, thus detaching the filter and pump. Remove the old union and set it aside. Now, you're ready to attach the new union. Apply Teflon tape on all threads to prevent minor leaks - about 6-8 rotations should do the trick. Insert one side of the union into the side port of the pump, and the other side into the filter port labeled "TO PUMP". Use a wrench to tighten both fittings and ensure they are secure. Lastly, turn the nut located on the filter side until it firmly connects both pieces together. FAQ: Q1: What is a union used for in pool maintenance? A: A union is used to connect two pieces of pool equipment, usually the pump and the filter. Q2: When might I need to replace a union? A: You may need to replace a union if you decide to change your pump or if the union has cracks from exposure to harsh winter temperatures. Q3: What tools do I need to replace a union? A: You will need a wrench to easily detach and attach equipment and a roll of Teflon tape to provide a secure seal on the new union's threading. Q4: How do I control water flow when replacing a union? A: You can control water flow using shut-off valves. If these are not available, use a Hayward 1022 black cap or rags to stop water flow. Q5: Who can I contact if I have questions about replacing a union? A: For any questions about replacing a union, you can reach out to your local Great Escape team. We're always happy to help!
- A Step-by-Step Guide on How to Attach a Shut Off Valve
Shut off valves play a crucial role in making maintenance tasks easier and more efficient by allowing you to stop the water flow without the need for extra tools or devices. This step-by-step guide will show you how to attach a shut off valve to your pool equipment. Key Takeaways: Shut off valves provide an easy and convenient way to stop the water flow during maintenance tasks, eliminating the need for additional tools or devices. Wrap Teflon tape around the threads of the shut off valve to ensure a secure and leak-free connection. The position of the valve handle indicates whether the valve is open or closed. Turning the handle to the side closes the valve, while turning it forward opens the valve. Step-by-Step Process: Detach the hose and hold the end upright to prevent water spillage. Redirect the flow by placing the hose end into the pool, minimizing water loss. Apply Teflon tape to the shut-off valve threads for a leak-proof seal. Remove any existing fitting if present, using a wrench. Install the new valve, tightening securely. For new installations, directly attach the valve and tighten. Ensure the valve is in the closed position (handle to the side) to stop water flow/water pressure is off. Connect the hose to the valve and secure with a clamp. Check that all connections are tight. Open the valve (handle forward) to start water flow/apply water pressure and test the system. Your shut-off valve is installed and ready for pool maintenance use. FAQs: Q1: Do shut off valves come in different sizes? A: Most shut off valves are the same size as standard hose fittings, allowing for easy attachment to pool equipment. Q2: Can I use Teflon tape for all fittings during the attachment process? A: It is recommended to use Teflon tape on the threads of shut off valves and other fittings to ensure a tight seal and prevent leaks. Q3: How do I know if the shut off valve is open or closed? A: The position of the valve handle indicates whether the valve is open or closed. When turned to the side, the valve is closed, and when turned forward, the valve is open. Q4: Can I remove and reattach the shut off valve when needed? A: Yes, shut off valves can be easily removed and reattached as necessary for pool maintenance tasks. Q5: What should I do if I encounter difficulties during the shut off valve attachment process? A: If you have any questions or concerns about attaching a shut off valve, do not hesitate to contact your nearest Great Escape team. We're always happy to help!
- Achieve Leak-Proof Pool Maintenance with Teflon Tape
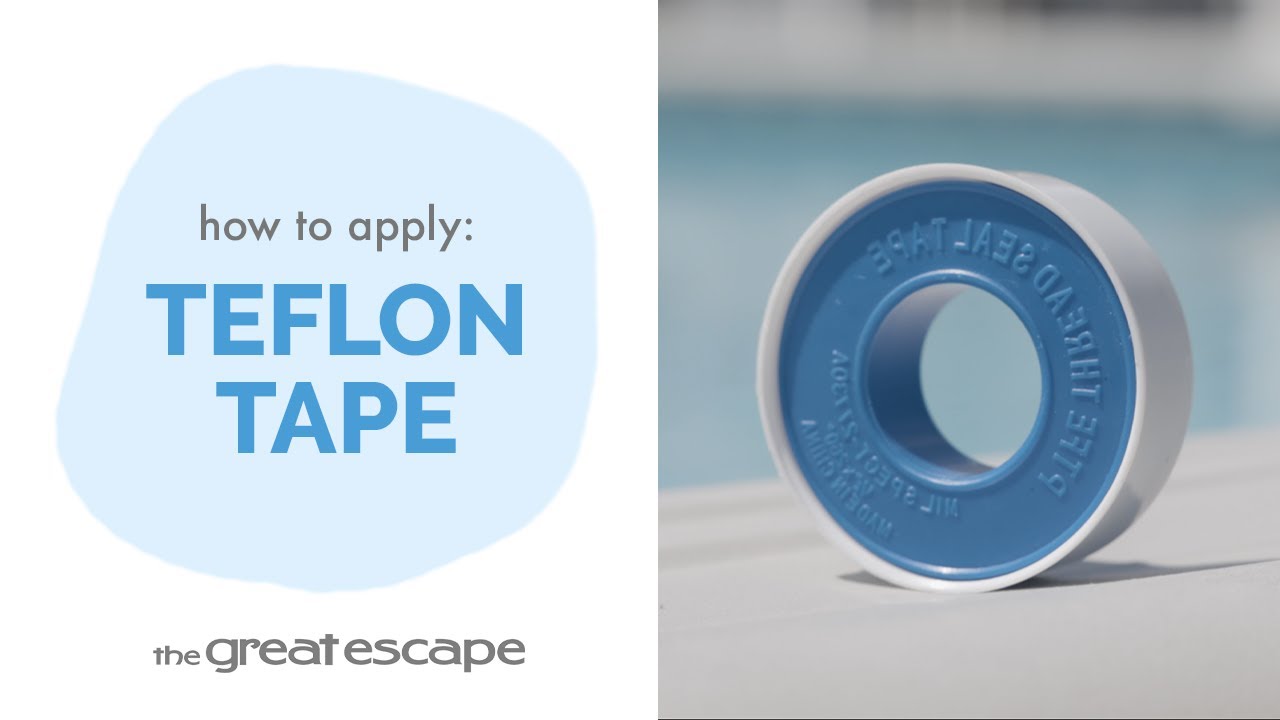
Step up your pool care game with our tutorial on using Teflon tape! This essential tool ensures a secure fit when attaching fittings and valves to your pool equipment, preventing water leaks and the entry of air. Explore the simple yet crucial steps of using Teflon tape, from gauging the right quantity to expertly wrapping your equipment threads. Key Takeaways: Teflon tape is key to securing fittings and valves in your pool equipment, eliminating water leaks and blocking air from entering the connections. The tape, which comes in a user-friendly fitted roll, should be wrapped around the threads of fittings and valves 4-6 times to ensure a secure fit. Excessive wrapping with Teflon tape can make it difficult for the fittings to be properly positioned, so a balance in its application is necessary. Step-by-Step Process: Ensure you have ample Teflon tape to wrap around all fitting and valve threads required for your project. Peel the edge of the tape from the roll, and carefully wrap the threads 4-6 times. The aim is to have the threads adequately covered but not obscured. With your fittings and valves properly wrapped, they are now ready for use! FAQs: Q1: What is the purpose of Teflon tape in pool maintenance? A: Teflon tape is used to secure fittings and valves to your pool equipment, preventing water leaks and air from entering the connections. Q2: How should I apply Teflon tape? A: Teflon tape should be wrapped around the threads of fittings and valves 4-6 times, ensuring that the threads are covered but not obscured. Q3: Can I use an excessive amount of Teflon tape? A: Overuse of Teflon tape can hinder the proper positioning of fittings, so balance in its application is essential. Q4: What should I do if I have questions about using Teflon tape? A: If you have any queries about using Teflon tape, you can reach out to your local Great Escape team. We're always happy to help!
- How to Replace a Pool Fitting: A Quick and Simple Guide
In this brief tutorial, The Great Escape demonstrates how to easily replace a pool fitting. This straightforward process will help ensure your pool system is running efficiently and leak-free. Key Takeaways: Replacing a fitting helps prevent leaks and ensures proper connections in your pool system. Teflon tape is important to create a watertight seal on the threads of the new fitting. Channel locks may be necessary to loosen or tighten the fitting securely. Step-by-Step Process: 1. Unscrew the old fitting by turning it counterclockwise. Use channel locks if it’s too tight to remove by hand. 2. Add Teflon tape to the threads of the new fitting to ensure a watertight seal. 3. Screw the new fitting into place by turning it clockwise. Tighten with channel locks if necessary, especially if you detect any leaks. Resources and Explanations: Teflon Tape: A common material used to create a watertight seal when connecting threaded fittings. Channel Locks: Useful tools for loosening or tightening pool fittings that are difficult to turn by hand. FAQs: Q1: Why is Teflon tape necessary for replacing a fitting? A: Teflon tape creates a watertight seal on the threads of the fitting to prevent leaks. Q2: How tight should the new fitting be? A: Tighten the fitting enough to create a secure seal but avoid overtightening, which could damage the fitting. Q3: What should I do if the fitting still leaks after installation? A: If the fitting leaks, try tightening it further with channel locks, or reapply Teflon tape and reinstall. If you have any questions or need further assistance, The Great Escape team is here to help with all your pool care needs. Contact us anytime for expert advice!
- Your Ultimate Guide to Hot Tub Delivery and Installation
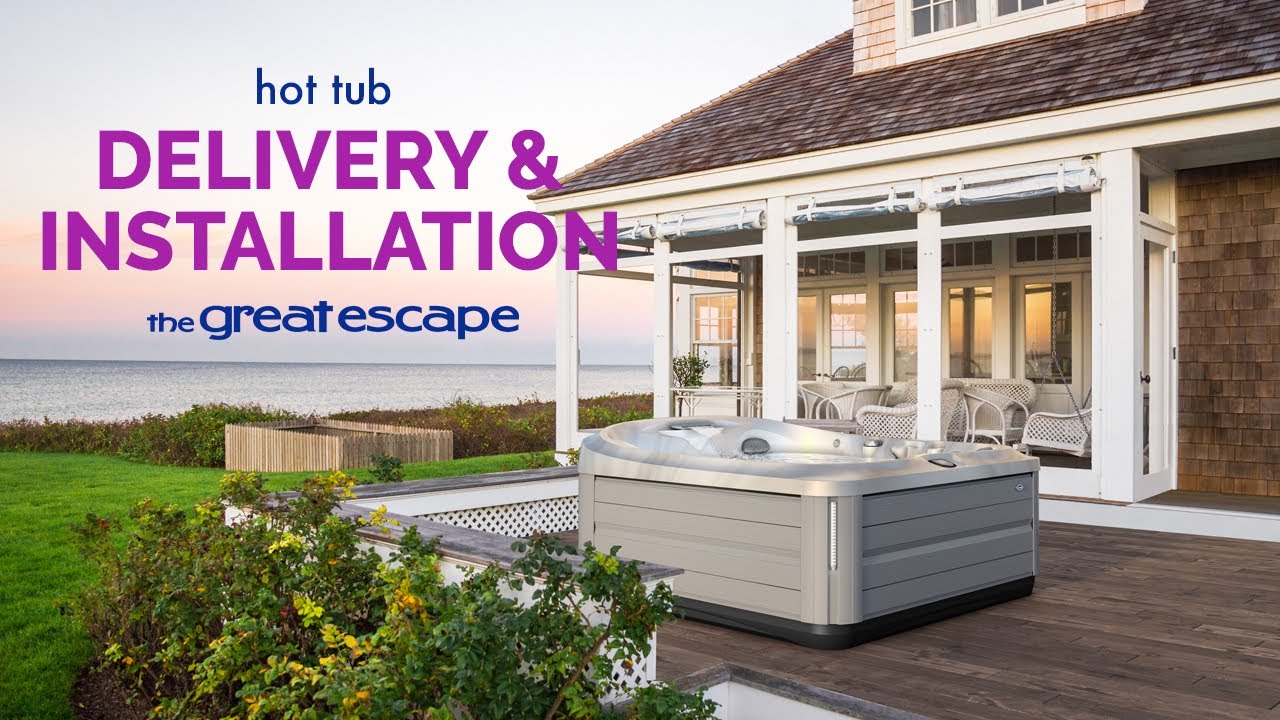
Getting ready for your new hot tub? This guide walks you through what to expect before delivery, how to prepare your space, and what happens during installation and setup. The Process Preparation is Key: Ensure you have accurate measurements of your space and the path to your property. This helps our team plan a perfect delivery route, avoiding obstacles and helps prevent damage to the spa. Be sure to note electrical boxes, awnings, and other architectural obstacles on the path. Note that our team cannot temporarily remove railings, fencing, or shrubbery to make the tub fit the day of delivery. Please make any necessary arrangements in advance. Visual Planning: Snap 2-3 photos of the delivery path using your phone to give us a clear view of any potential obstructions or tricky areas. This will help our team make accommodations for the space with the right equipment to help prevent damage to the spa and allow the process to go smoothly. Secure the Base: A sturdy, level base is crucial for your hot tub's installation. Consider a deck, materials like compacted pea gravel, cement, or brick tile to prevent shifting. Delivery Day: Our team creates a list based on locations grouped together and delivery times are determined 1-2 days in advance. We can narrow down the delivery to a 3-hour window but cannot guarantee a specific time. You (the customer) must request to receive a courtesy call from the team the day of the delivery. The team will then call within an hour of their arrival to ensure you're present for setup adjustments. Professional Installation Support: For complex installations, such as using a crane, coordination with professionals is necessary for safety and precision. You (the customer) are responsible for all communication related to arrangement and scheduling of a crane installation. Any changes, delays, and costs accrued due to crane installations will be handled by you (the customer) and relayed to the delivery team when applicable to scheduling, delivery, and installation of the spa. Lawn Protection: To safeguard your lawn during delivery, consider laying down plywood along the path where the hot tub will be transported. This helps distribute the weight and minimizes damage to the grass. Note that customers should provide the plywood, as our delivery trucks are not equipped to carry these materials. Cover and Step Setup: Our delivery crew takes care of assembling and setting up the cover lift and steps, ensuring your hot tub is ready for immediate use. The delivery and installation team does not hook up, fill, or start the spa for you (the customer). Packaging Material Handling: After installation, the delivery team will neatly bundle all packaging materials, making it easy for you to dispose of. However, the responsibility for the disposal of these materials rests with the homeowner. Completion and Sign-off: The delivery process is officially complete once you sign off on the digital contract. This acknowledgment confirms that the hot tub has been installed to your satisfaction and that our team has met all service expectations. Post-Delivery Setup: After delivery, scheduling an electrician within 1-2 days after delivery ensures all electrical components are correctly installed for your spa's optimal performance. We recommend filling the spa with water only after an electrician has given approval to do so. Enjoy Your Spa: With your spa installed, it's time to fill it, treat the water, and dive into relaxation. Need Assistance? Our spa experts are here to help! For any questions about preparing for your hot tub delivery or installation, reach out to us or visit our website for more information: www.shopthegreatescape.com
- Above-Ground Pool Delivery and Installation Guide
Embark on a splashy new adventure with your home's latest addition—a swimming pool that promises endless summer fun and relaxation! Our video walks you through every step of the installation process. The Process Pre-Digging Survey: Confirm underground utilities with a local survey to prevent service disruptions, and comply with all town permits and HOA regulations. Professional locators will mark utility lines at no cost within 2 days of your request. Delivery Preparation: Your pool will arrive on 1-2 pallets 4'x4' pallets, delivered to a covered area for protection. We'll coordinate the delivery with you, noting that material delivery and installation are scheduled separately, sometimes occurring weeks apart. Installation Impact: Anticipate significant yard alterations during installation. The use of a Bobcat will affect grass and landscaping, resembling a construction zone. Excess Soil Management: Large amounts of earth will be displaced, resulting in sizable dirt piles. Pre-plan for soil removal or usage—our affiliated installers can haul away the dirt at an additional cost. These arrangements should be made by the customer prior to the installation date. Smaller Yard Considerations: Be aware that installations in smaller yards can lead to a more concentrated mess, with limited space for dirt piles and machinery maneuvering. Homeowner Preparations: Ensure gates, shrubbery, hedges, or fencing that could obstruct the installation are removed before the scheduled date. Installers will not be responsible for this task. Aftermath Readiness: Prepare for post-installation cleanup. While our team will manage the packaging materials, the handling of excess soil and restoration of the landscape will be the homeowner's responsibility. Installation Day: Typically, the process takes about 4 hours. Weather or unforeseen issues/obstacles may influence timing. Contact your salesperson directly for more information. Initial Pool Setup: The installers will shape the pool with precision, ensuring a level base and properly installed walls. Customer's Digging Responsibility: Self-digging must adhere to specified standards to prevent extra costs. Ensure the base is level and meets pool size specs. Incorrect digs will incur fees for correction. Arrange for excess dirt disposal and clear any installation obstructions like gates or fences. Wall and Base Construction: Watch as our team constructs the pool's framework and smooths the sand base, preparing for the liner and initial water fill by our crew. Soil Removal Responsibility: Once the pool walls are erected and the backfill applied, any surplus dirt needs to be removed. While our installers can provide this service for an extra charge, it must be scheduled before installation day. Initial Water Fill by Crew: Our installation crew will add a few inches of water to the pool to secure the liner and let the pool's foundation settle. Complete Pool Filling by Customer: After our crew's initial water fill to allow the pool to settle, it's the homeowner's task to complete the filling process. Final Setup: The installation includes setting up the skimmer, return, and filtration system into the access panel. Electrical setups, like pump and heater installation, are the customer's responsibility. The customer is also responsible for adding chemicals, sanitizers, or cartridges to the filtration system's components. Post-Installation: Our team will clean up and bundle packaging materials for your disposal. Installers are NOT responsible for hauling away or disposal of packing materials. Sign-off completes the process. Electrical Verification: Schedule an electrician's visit within 1-2 days post-installation to ensure all electrical components are correctly installed and functioning safely. Water Quality Assurance: After filling your pool, bring a water sample to your local Great Escape store for a complimentary digital water test. Our specialists will assist you in achieving the perfect water balance. Need Help? Our pool experts are here to ensure your installation is as smooth as your first swim. Contact us with any questions or visit our website for comprehensive guides: www.shopthegreatescape.com
- Elevate Your Spa’s pH Level with pH Up
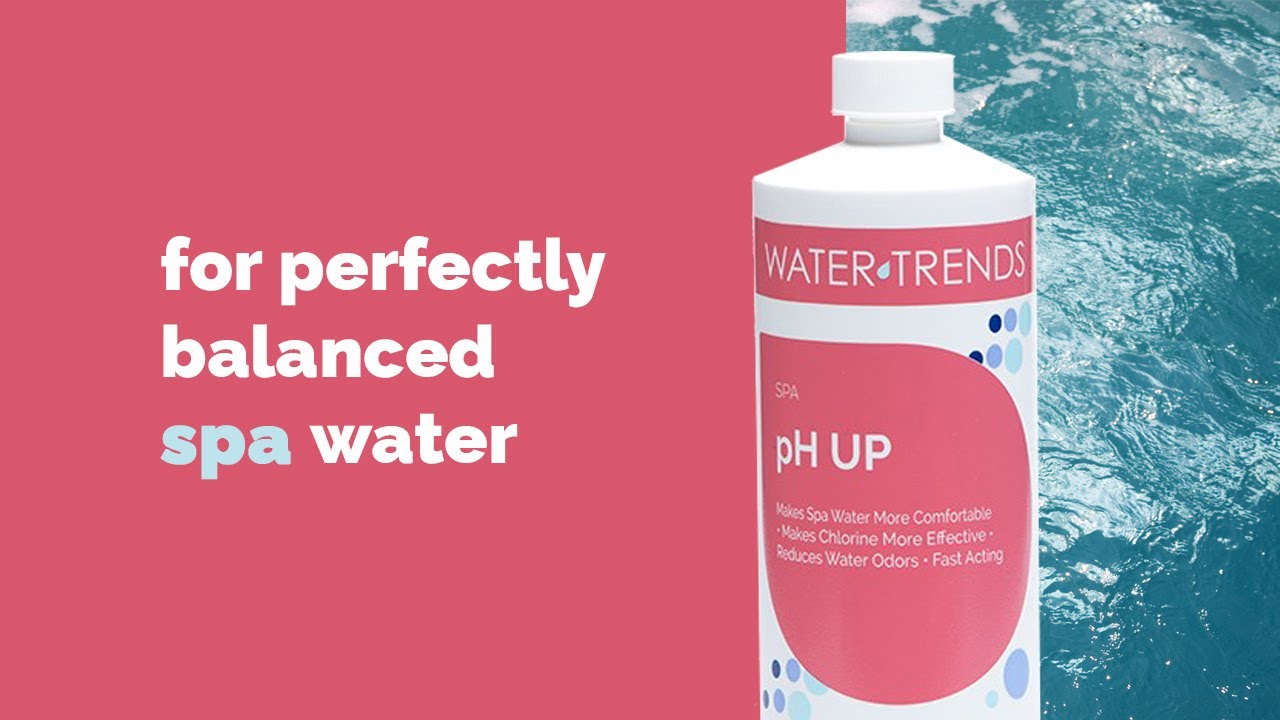
A blissful spa experience starts with the right water balance. pH Up is your ticket to clearer, more comfortable water that is gentle on both your skin and your hot tub equipment. Dive into our guide on making the most of Spa pH Up. Key Takeaways: Spa pH Up ensures water that is less corrosive to equipment and free from odors. Maintaining the ideal pH range of 7.2-7.8 is pivotal for avoiding skin and eye irritations. Regular pH level checks using test strips can help in the timely application of pH Up. Step-by-Step Process: Utilize test strips to consistently monitor your spa water’s pH levels, ideally on a daily basis. If the pH reading is below 7.2, it's time for some pH Up. While the spa pump is active, pour in 1 oz. of pH Up for every 200 gallons of water. Always reference the dosage chart on the product’s bottle for precise measurements. If the pH reading dips below 6.6, adhere to the guidelines for a "below 6.8" reading. Post application, ensure the water circulates for a minimum of 20 minutes. After an hour, retest the pH. Apply additional pH Up if needed until the desired pH is achieved. Resources Mentioned: Spa pH Up: A formula specifically designed to elevate the pH of spa water, making it less corrosive and more balanced. Test strips: Essential tool for determining the current pH levels in spa water, ensuring accurate product application. FAQs: Q1: Why is maintaining the right pH level important for my spa? A: The correct pH level ensures your spa water is comfortable, reduces wear on equipment, and minimizes skin and eye irritations. Q2: How frequently should I test the pH levels of my spa water? A: We recommend checking the pH levels daily using test strips for the most accurate and timely maintenance. Q3: What if the pH level drops below 6.6? A: In such cases, use the dosage recommended for a "below 6.8" reading to effectively raise the pH. Q4: How soon after adding pH Up can I use my spa? A: After adding pH Up and allowing circulation for 20 minutes, wait about an hour before taking another pH reading. Once the desired pH level is reached, you can dive in. Q5: Is it possible to overdose my spa with pH Up? A: Always refer to the dosage chart on the bottle and monitor pH levels after each application to avoid over-adjustment. At The Great Escape, our mission is to elevate every aspect of your spa experience. Through our expertly crafted products like Spa pH Up, we're here to ensure your hot tub moments are clear, comfortable, and utterly delightful. For any spa concerns, remember, we're just a call away!
- Decrease Your Spa’s pH Level with pH Down
A blissful spa experience starts with the right water balance. pH Down is your trusted formula for adjusting alkaline levels to ensure clear, comfortable waters while giving your hot tub equipment the long life they deserve. Here's your blueprint to optimal spa water with pH Down. Key Takeaways: Spa pH Down is your key to decreasing water odors, boosting safety, and preserving equipment integrity. For the prime spa experience, ensure the pH stays within the 7.2-7.8 range. Applying pH Down not only corrects pH but can also efficiently reduce high alkalinity. Step-by-Step Process: Use test strips daily to determine your spa water's pH levels. If the pH exceeds 7.8, it's pH Down to the rescue. For alkalinity reduction, incorporate 1 oz. of pH Down for each 200 gallons of water. Always cross-reference with the bottle's dosage chart for precise needs. Disperse the chemical uniformly and set the spa pumps in motion for about 10 minutes, ensuring thorough distribution. Post-treatment, test the water again, aiming for an alkalinity drop of approximately 10 ppm. Once you achieve balanced levels, your spa is ready for relaxation. Resources Mentioned and Their Explanations: Spa pH Down: A premium solution that decreases pH and alkalinity in spa waters, ensuring optimal clarity, safety, and equipment protection. Test strips: Essential monitoring tools offering real-time insights into your spa's pH levels. FAQs: Q1: Why is it essential to maintain the right pH in my spa? A: A balanced pH ensures water that's comfortable, clear, and free of strong odors. Plus, it safeguards your spa equipment from potential alkaline-related damages. Q2: How often should I monitor my spa's pH levels? A: Daily checks using test strips are recommended to maintain a consistently comfortable and safe spa environment. Q3: If the pH is exceedingly high, how many treatments with pH Down may be needed? A: One treatment of pH Down should lower alkalinity by around 10 ppm. However, the exact number of treatments depends on the initial alkalinity reading and the desired level. Q4: After adding pH Down, how soon can I use the spa? A: Once you've balanced the pH and allowed the water to circulate for about 10 minutes, you're good to go! Q5: Can I combine pH Down with other spa chemicals? A: Avoid mixing different chemicals in one container. Always add them separately to the spa water, ensuring safe and effective treatment. At The Great Escape, we believe in providing perfect spa moments. With products like Spa pH Down, we aim to offer you the luxury of balanced, crystal-clear waters each time you step into your spa. For clarity, comfort, and questions, remember, we're always here for you.
- Spa Care Essentials: Alkalinity Up for Balanced Water
Welcome to your go-to guide for understanding and using Alkalinity Up, an essential but often overlooked spa maintenance product. Alkalinity Up ensures that your spa's water chemistry remains balanced, setting the stage for optimal relaxation and longevity for your spa's components. Let's dive into the benefits and the process of using this key spa essential. Key Takeaways: Keeping the alkalinity of your spa water in the right range is crucial for water balance, equipment longevity, and the effectiveness of other chemicals. The ideal alkalinity range for a spa is between 80-120 ppm (parts per million). It's a straightforward process to add Alkalinity Up to your spa water. Doing so at regular intervals can make a world of difference in your spa's overall health. Step-By-Step Process: Start by testing your spa water with test strips to find out the current alkalinity level. Make sure to turn off the spa jets to allow the chemical to distribute evenly. Use the guidelines provided on the Alkalinity Up bottle to determine how much you'll need. Slowly add the measured Alkalinity Up directly to the spa water. Turn your spa jets back on to help circulate the Alkalinity Up throughout the water. Wait for at least 20 minutes and then re-test the water to ensure that it's within the desired range. Resources: Test Strips: These are essential for measuring the alkalinity, pH, and other parameters of your spa water. Alkalinity Up: This bottle will usually have guidelines for how much of the product to add based on your spa's capacity. FAQs: Q1: How often should I use Alkalinity Up? A: Aim to test and adjust your spa's alkalinity levels every week. Q2: Is it safe to use with other chemicals? A: Yes, but always consult the guidelines on each product and never mix chemicals together. Q3: Can I use it in any spa? A: Alkalinity Up is compatible with most types of spas, but it's always good to check your spa's manual for specific guidance. Q4: What happens if I add too much? A: Excess alkalinity can cause scaling and cloudiness. You'll need to balance it by adding a reducer. Q5: Can I use pool chemicals instead? A: Spa-specific chemicals are formulated differently and are recommended for optimal results. At The Great Escape, we're committed to making your spa experience as seamless and enjoyable as possible. Our team is always available to help you navigate the ups and downs of spa maintenance.
- Keep Your Spa Stain-Free with Metal and Stain Control
Every spa owner dreams of a pristine, inviting hot tub free from unsightly mineral stains. With WATER TRENDS Metal and Stain Control, you can easily transform that dream into reality. Dive into a world where your spa not only feels good but looks dazzlingly clear too. Key Takeaways: Metal and Stain Control is a vital product to maintain a clear and stain-free spa. It's essential to balance the water's alkalinity and pH levels before applying Metal and Stain Control. Regularly using Metal and Stain Control, especially after refilling or topping off with tap water, ensures consistent water clarity. Step-by-Step Process: Before starting, ensure no chemicals have been added for the past 24 hours. Test the water once the spa is filled, focusing on the alkalinity and pH levels. Balance these levels using Alkalinity Up, pH Up, or pH Down as required. Wait for another 24 hours post the chemical adjustment. Turn the spa pumps on high. Administer Metal and Stain Control, using a rate of 1 oz. per 200 gallons of water. Refer to the bottle's usage chart to confirm the accurate dosage for your spa's size. If adding tap water to refill or top off the spa, repeat the process. Resources Mentioned: Alkalinity Up, pH Up, and pH Down: These are chemical adjusters to balance your spa's water chemistry, ensuring optimal conditions for Metal and Stain Control. Metal and Stain Control: The core product from WATER TRENDS that prevents mineral stains and discoloration in your spa or hot tub. FAQs: Q1: How often should I use Metal and Stain Control? A: Use it during every hot tub startup and each time you refill or top off your spa with tap water. Q2: Can I use other chemicals simultaneously with Metal and Stain Control? A: It's advised to wait 24 hours after adding any other chemicals before using Metal and Stain Control. Q3: How do I know the correct dosage for my spa? A: The product comes with a usage chart on the bottle to guide you based on your spa's gallon capacity. Q4: What should I do if I see mineral stains even after using the product A: Ensure you're balancing the alkalinity and pH levels correctly before applying. If problems persist, consult with the Great Escape team. Q5: Is it safe for my spa's surfaces? A: Absolutely! The product is designed to protect and keep your spa's surfaces clear and stain-free. Your spa is a haven of relaxation and luxury. At The Great Escape, we're dedicated to ensuring your experience remains top-notch. Whether it's about Metal and Stain Control or any other spa concerns, remember, we're just a call away.
- Harnessing Calcium for Crystal-Clear Bliss
Your spa deserves the best, and with Calcium Hardness, you're guaranteeing it gets just that. Protect, preserve, and prolong your spa's life with ease. Key Takeaways: Proper calcium levels can prevent cloudy water and save your spa's surfaces and machinery from potential harm. Utilizing test strips designed for calcium hardness measurement will ensure you achieve the optimum range. Calcium Hardness offers an uncomplicated way to maintain a calcium balance, ensuring your spa's long-term health. Step-by-Step Process: Kick things off by testing the spa water with calcium hardness-specific test strips. Aim for a calcium hardness level between 150 and 250 parts per million. If your test reveals levels under 150 ppm, it's time for Calcium Hardness to step in. With the spa pump buzzing on high, consult the dosage chart on the product package. Pour the recommended amount into the water, letting it circulate for a minimum of 20 minutes. Shut off the pump, retest, and if levels are still wanting, repeat the procedure. Resources Mentioned: Test Strips: These are essential for accurately gauging the calcium levels in your spa water. Calcium Hardness Dosage Chart: Located on the Calcium Hardness package, this resource gives precise amounts based on your spa's water volume. FAQs: Q1: Why is maintaining calcium hardness so crucial? A: Low calcium levels can lead to issues like cloudy water and may damage the spa's surfaces and equipment. Q2: How frequently should I test for calcium hardness? A: It's a good practice to check regularly, especially if you notice changes in water clarity or feel. Q3: Can I mix Calcium Hardness with other spa chemicals? A: No, always apply each chemical separately and avoid mixing products. Q4: Is there a risk of adding too much Calcium Hardness? A: Overdosing can elevate calcium levels beyond the recommended range, which may cause scaling or cloudy water. Q5: How long after adding Calcium Hardness can I use my spa? A: After ensuring the chemical has circulated for at least 20 minutes and the levels are in the desired range, your spa is ready for use. Remember, for all your spa concerns, the Great Escape team is here!