Search this site
121 results found with an empty search
- A Quick Guide on How to Replace a Winter Winch
In this tutorial, we’ll guide you through the process of replacing a winter winch on your pool cover. This step is crucial for ensuring that your winter cover remains secured, and your pool is well-protected during the cold season. Key Takeaways: Loosen the old winch by turning the wing nut counterclockwise to remove the cable. Insert the cable ends into the new winch, ensuring each end is properly threaded. Tighten the new winch securely by turning the wing nut clockwise. Step-by-Step Process: Push down on the lock nut of the old winch and hold it in place. Turn the wing nut counterclockwise to loosen the cable. Once the cable is loose, pull it out from both sides of the winch. Take both ends of the cable and insert them into opposite sides of the new winch. Thread the ends into the center hole and tighten the wing nut by turning it clockwise until the cable is securely fastened. Resources and Explanations: Winter Winch: The winch is used to tighten the winter cable that holds your pool cover in place. Replacing an old or broken winch is vital to prevent your pool cover from coming loose. Winter Cable: Make sure the cable is in good condition as you thread it through the new winch to ensure proper pool cover security. FAQs: Q1: When should I replace my winter winch? A: Replace your winch if it shows signs of wear, rust, or difficulty tightening the cable. Q2: Can I use the same winter cable with a new winch? A: Yes, as long as your cable is in good condition, you can reuse it with the new winch. Q3: How tight should I make the cable? A: The cable should be snug but not overly tight to avoid damaging the pool cover or winch. You’ve now successfully replaced your winter winch, ensuring your pool cover is secure for the colder months. If you have any questions, don’t hesitate to visit your local Great Escape store. We’re always happy to assist!
- A Quick Guide on How to Replace Your Winter Pool Cable
In this tutorial, we’ll walk you through the steps to properly replace your winter cable, ensuring your pool cover is securely fastened for the cold season. Key Takeaways: Remove the winch and loosen the old cable before pulling it out from the cover grommets. Thread the new cable through the cover’s grommets, moving over and under for a secure fit. Use the winter winch to tighten the new cable and secure your pool cover. Step-by-Step Process: Begin by removing the winter winch. Push down on the lock nut, hold in position, and turn the wing nut counterclockwise to loosen the cable. Pull out the cable from each side of the winch. Remove your winter cover from the pool. Slowly pull out the old cable from the cover grommets. Thread the new cable through the grommets, moving over and under the cover. Tie the two ends of the new cable together in a knot to hold in place. Apply the winter cover back onto the pool. Insert the cable ends into opposite sides of the winch and tighten by turning the wing nut clockwise until the cable is secure. Resources and Explanations: Winter Cable: This cable ensures the pool cover stays securely in place during harsh winter conditions. Winter Winch: The winch tightens the cable around the pool cover, making sure it's snug and protective. FAQs: Q1: How often should I replace the winter cable? A: Replace your winter cable when it shows signs of wear, fraying, or if it’s difficult to tighten. Q2: Can I reuse the same winch with a new cable? A: Yes, as long as the winch is functioning properly, you can use it with a new cable. Q3: Should I fully tighten the cable before placing the cover? A: No, tie the cable loosely and fully tighten it after placing the cover back on the pool. That's how you successfully replaced your winter cable and secured your pool cover. If you have any further questions or need assistance, visit your local Great Escape store. We’re always here to help!
- Winter Shield: Securing Your Pool's Winter Cover
Winter is knocking on the door, and while we may enjoy the coziness indoors, our pools need a bit of extra care. Ensuring your pool is properly shielded during the frosty months will save you a lot of trouble come springtime. Let's help you get started with the right winter cover, ensuring your pool’s safety and clarity. Key Takeaways: Purchase based on your pool size, NOT cover size. The cover size is 3-4 ft bigger than the actual pool size. This will ensure that the product will fully cover your top ledges, allowing your cable and winch to safely fasten the cover to the pool. For pools with larger than 6” top rails, we recommend purchasing a cover 4 ft larger than your pool size. Mask those pesky sharp edges to ensure your cover remains tear-free. The magic of a winch ensures your cover stays right where it should be. Step-by-Step Process: Before draping the cover, use cloth or masking tape on sharp pool edges. It's an easy trick to keep the cover rip-free. Thread the cable through the grommets around the pool cover. Place the cover over the pool, making sure it's even all around. Feed both cable ends into the winch and turn that handle! If adjustments are needed, give the tension handle a twist. Resources Mentioned: Pool Cover: This is the main shield against winter's harshness. Remember to buy based on pool size! Cable and Winch: The dynamic duo ensuring your cover stays put. FAQs: Q1: Why is it important to cover sharp edges? A: Sharp edges can tear and damage the pool cover, shortening its life and effectiveness. Q2: I've chosen the cover based on my pool's size, but it looks too big. Is that right? A: Absolutely! The cover is designed to be larger to ensure complete coverage and safety. Q3: Do I always need to use the winch for tightening? A: For the best secure fit, yes. The winch ensures the cover remains snug against winter winds. Q4: How do I know when the cover is tight enough? A: It should be taut and secure, but not overly strained. Q5: How often should I check my pool cover during winter? A: It's a good idea to inspect it after heavy snow or wind to ensure it's still secure. Remember, the essence of a serene pool season starts with winter care. If you have any further questions or need advice, don’t hesitate to reach out to your local Great Escape team. We're always here, dedicated to ensuring your pool's perfect hibernation. A few notes on inflating your pillow: The inside portion of the red seal pushes in and opens enough to allow air to enter when using an air compressor or vacuum to inflate the pillow. Just be sure that there is a secure fit between the pillow valve and the compressor/vacuum nozzle so that air doesn't escape. The trick is to not fill it all the way, roughly 70% full, to allow for compression. Putting duct tape over the air valve can help as well. Here is the tutorial on how to do it: https://www.youtube.com/watch?v=PpTdX2-Zi7o
- Securing a Winter Pillow with Pillow Pal
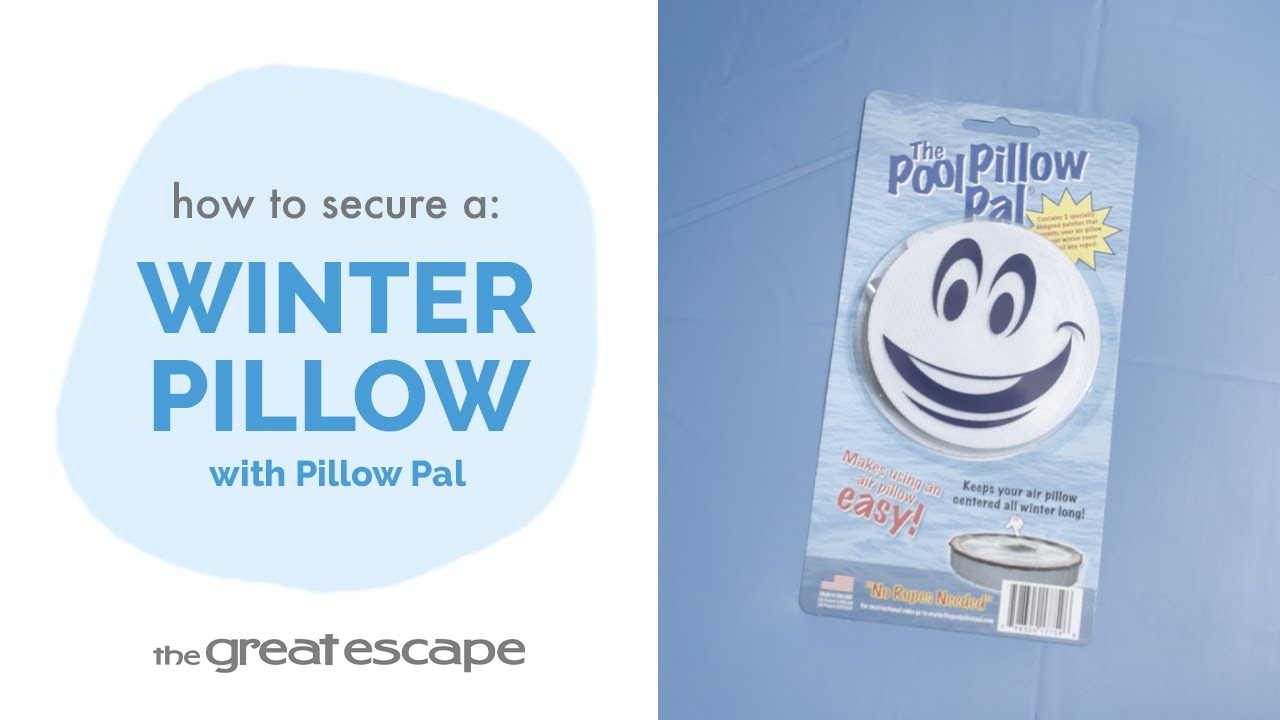
When winterizing your pool, it’s crucial not to overlook the importance of the winter pillow. Acting as a cushion and ice compensator, it plays a pivotal role in safeguarding your pool's structure from ice expansion. It relieves the stress made as the ice expands against the walls of your pool during the winter. Let’s dive into how to make sure that pillow stays put with Pillow Pal! Key Takeaways: It uses velcro to effortlessly attach your pool pillow to the cover. Your pool pillow is a vital player in taking the pressure off your pool walls when ice starts its expansion journey. Always ensure your pillow is inflated just right to avoid unexpected pops when ice pushes back. Proper placement and securing of the pillow are crucial for its effectiveness. Step-by-Step Process: Begin by inflating your pillow using a shop vac or air compressor. The inside portion of the red seal pushes in and opens enough to allow air to enter when using an air compressor or vacuum to inflate the pillow. Just be sure that there is a secure fit between the pillow valve and the compressor/vacuum nozzle so that air doesn't escape. The trick is to not fill it all the way, roughly 70% full, to allow room for pressure on the pillow as ice expands. Once inflated, shut the red cap. For added assurance, put a piece of duct tape over the cap. Here is the tutorial on how to properly inflate a winter pillow: https://www.youtube.com/watch?v=PpTdX2-Zi7o For more details on inflation, you can watch this video: https://youtu.be/RtchrI0wTZ8 Stick one side of the velcro to the pillow's center. Precision matters. Use a tape measure to ensure your pool pillow is exactly centered on the winter cover. Apply the other side of the Pillow Pal on the cover. Attach the pillow's velcro to the cover's velcro. Your pillow and cover are now attached With the pillow attached, it's like giving your pool a winter cushion, easing the icy stress on the pool walls. FAQs: Q1: Why do I need a winter pillow? A: The pillow acts as a cushion, reducing pressure from ice on the pool's walls. Q2: Should the pillow be fully inflated? A: No. Filling it 70% of the way prevents potential pops when ice forms around it. Q3: Why tape the red cap? A: It's an extra precaution to ensure the pillow stays inflated all winter long. Q4: What's the purpose of the Pillow Pal? A: Pillow Pal is designed to attach your pool pillow to your winter cover without any string hassles. Q5: Can I reuse the Pillow Pal next winter? A: While they are durable, it's best to check the stickiness of the velcro for optimal performance each year. Q6: How do I ensure the velcro sticks properly to the pillow and cover? A: Make sure both surfaces are clean and dry before sticking the velcro patches. Q7: How often should I check the pillow during winter? A: Periodically check on it, especially after heavy snowfalls or temperature drops, to ensure it's in place and undamaged. Here at The Great Escape, we're all about ensuring your pool remains safe and sound during winter’s embrace. If you have any questions, feel free to contact us. Dive into a worry-free winter!
- Securing a Winter Pillow with String
When winterizing your pool, it’s crucial not to overlook the importance of the winter pillow. Acting as a cushion and ice compensator, it plays a pivotal role in safeguarding your pool's structure from ice expansion. It relieves the stress made as the ice expands against the walls of your pool during the winter. Let’s dive into how to make sure that pillow stays put with string! Key Takeaways: Ice Stress Reliever: Your pool pillow is a vital player in taking the pressure off your pool walls when ice starts its expansion journey. Safety First: Always ensure your pillow is inflated just right to avoid unexpected pops when ice pushes back. Just Right: Proper placement and securing of the pillow are crucial for its effectiveness. Step-by-Step Process: Begin by inflating your pillow using a shop vac or air compressor. The inside portion of the red seal pushes in and opens enough to allow air to enter when using an air compressor or vacuum to inflate the pillow. Just be sure that there is a secure fit between the pillow valve and the compressor/vacuum nozzle so that air doesn't escape. The trick is to not fill it all the way, roughly 70% full, to allow room for pressure on the pillow as ice expands. Once inflated, shut the red cap. For added assurance, put a piece of duct tape over the cap. Here is the tutorial on how to properly inflate a winter pillow: https://www.youtube.com/watch?v=PpTdX2-Zi7o For more details on inflation, you can watch this video: https://youtu.be/RtchrI0wTZ8 Spot the grommet holes on two sides of the pillow. Loop a string through these holes, securing it with sturdy knots. Place the pillow in the pool's center. Make sure the string isn't too tight. The pillow should be comfortably resting on the water. Now, anchor the pillow by tying each string end to the pool uprights. With the pillow in place, it’s time to put on your winter pool cover. FAQs: Q1: Why do I need a winter pillow? A: The pillow acts as a cushion, reducing pressure from ice on the pool's walls. Q2: Should the pillow be fully inflated? A: No. Filling it 70% of the way prevents potential pops when ice forms around it. Q3: Why tape the red cap? A: It's an extra precaution to ensure the pillow stays inflated all winter long. Q4: Can I use any string? A: It's recommended to use a strong and durable string like twine to ensure the pillow remains anchored. Avoid any string that contains metal as that can stain your liner if it should come loose during the winter and settle at the bottom of your pool. Q5: Why is it important for the string securing the winter pillow to be firm but not too taut? A: You do not want the string to be pulled too tightly because the pillow needs to rest on the water. If it is taut, it could snap under harsh weather conditions. Q6: How often should I check the pillow during winter? A: Periodically check on it, especially after heavy snowfalls or temperature drops, to ensure it's in place and undamaged. Here at The Great Escape, we're all about ensuring your pool remains safe and sound during winter’s embrace. If you have any questions, feel free to contact us. Dive into a worry-free winter!
- A Quick Guide on How to Properly Inflate a Winter Pool Pillow
In this quick guide, we’ll show you the proper way to inflate a winter pool pillow to protect your pool during the winter season. Key Takeaways: Use a shop vac or air compressor to fill the pillow ¾ full to allow for expansion. Ensure the red check valve is held open for easy inflation. Secure the red cap with duct tape to prevent air leaks throughout the winter. Step-by-Step Process: Open the red cap on the winter pillow. Push in the red check valve to allow air to flow freely. Use a shop vac or air compressor to inflate the pillow ¾ full. Close the red cap securely. Seal the red cap with duct tape to prevent air leaks during the winter. FAQs: Q1: Why should I only inflate the pillow ¾ full? A: The pillow needs room to expand when the pool water turns into ice and compresses the pillow. If the pillow is fully inflated, it will most likely preventing burst. Q2: Can I inflate the pillow by mouth? A: It's recommended to use a shop vac or air compressor for faster, more efficient inflation. Q3: Why do I need to tape the red cap? A: Taping the cap helps prevent air leaks and keeps the pillow properly inflated throughout the winter. Now you’ve successfully inflated your winter pool pillow, protecting your pool from winter damage. If you need further assistance or have questions, reach out to your local Great Escape store. We’re always happy to help!
- Winterize Your ProVision System
The cold season is coming, and just as you bundle up to protect against the chill, your ProVision system deserves that extra care too! Ensuring it’s properly winterized can prevent any unpleasant surprises come next season. Here's your guide to make sure everything's good to go. Key Takeaways: Drain ALL water to avoid any frost damage. Discard the mineral cartridge and replace next season. Save your V-Pack only after allowing it to fully dry before storing it in an airtight container. Keep your ProVision system away from the harsh winter elements. Step-By-Step Winterizing: Once you're done winterizing your pool, start by disconnecting the hoses from the Inlet and Outlet ports. Open up those lids on the chlorine and sanitizer compartments. Take out the mineral cartridge, wave it goodbye, and remember to get a new one for next year! Now’s the time to remove the V-Pack. Got some leftover chlorine in the blue tube? Allow it to completely dry and store in a sealed container. Don’t forget the drain cap at the bottom! Tilt your ProVision to make sure every last drop’s gone. Grab a cloth, give your ProVision a good wipe down to ensure there's no lingering moisture. Resources Mentioned: 1. V-Pack: This component holds the chlorine. If there’s any left at the end of the season, save it, but store it properly. 2. Mineral Cartridge: Essential for your system, but it’s a one-season wonder. FAQs: Q1: Can I reuse the mineral cartridge next season? A: No, you'll need a brand-new cartridge next pool season. Q2: What do I do with leftover chlorine in the V-Pack? A: Dry it completely and then stash it in a sealed container. Q3: Where should I store my ProVision system during winter? A: Find a dry spot that’s shielded from the cold and elements. Q4: Is there any maintenance required before using it next season? A: Always check for any signs of wear and tear and replace the mineral cartridge. Q5: I missed a step, is it a big deal? A: It's crucial to ensure all steps are followed for optimal care and longevity of your system. At The Great Escape, we're always here to ensure your swim season is splash-tastic, from the start of summer to winter’s close. If you still have questions, feel free to contact us or visit your local store.
- How to Properly Winterize Your Pump & Earth Filter
Winter's icy fingers are never gentle, especially on pool equipment. Your pool's filter and pump are susceptible to the cold, and an ounce of prevention now can prevent a world of repair costs later. We're here to guide you through the winterizing process of an earth filter system, ensuring its longevity through the harshest of seasons. Key Takeaways: Draining all water from your system is a non-negotiable step; leftover moisture can lead to cracks and damages. Proper storage away from the harsh elements is a vital step for the longevity of your equipment. Regular maintenance, including thorough cleaning and drying, safeguards the system's performance. Step-by-Step Process: Once you've winterized your pool, begin by disconnecting all hoses from the skimmer, return, and other fittings connected to both the pump and filter. Remove the drain cap located at the tank's bottom and ensure all water is drained. Leave the cap off during storage to prevent any moisture accumulation. Use a screwdriver to take off the clamp on the top. Clean the fingers using a hose, ensuring they're free from residue. Turn the bottom half of the tank upside down to ensure all residual water is drained. Extract the two screws where the pump is attached to the base. With a flat-head screwdriver, detach the drain plug located beneath the pump strainer housing. Ensure all water drains by tilting the pump. Use a cloth to dry all components, ensuring no moisture remains. Store your hose clamps and minor plugs inside the pump strainer housing for easy access come springtime. Shield your pump, filter system, and hoses from winter's grip by storing them in a dry, safe location. FAQs: Q1: Why is an earth filter system preferred by some pool owners? A: The earth filter system uses natural elements to purify the pool water, often resulting in clearer and softer water, making it a favored choice for those seeking a more natural filtration approach. Q2: What's the significance of the "fingers" in the earth tank? A: The "fingers" are integral components in the earth filter system. They help evenly distribute the pool water over the filter media, ensuring thorough filtration and preventing channeling. Q3: Is there a specific drying time recommended for the fingers and the tank before storing? A: It's best to let them air dry completely, which can take anywhere from a few hours to a day, depending on the humidity and temperature of the environment. The goal is to ensure no moisture remains before storage. Q4: How do I know if I've drained all the water effectively from the pump and filter? A: Once you've followed the draining steps and tilted the equipment, if no more water comes out and the components feel dry to touch, you've effectively drained them. It's always good to double-check, especially in crevices and joints. Q5: If I miss the winterizing step one season, what potential damages should I anticipate? A: Neglecting winterization can lead to water freezing inside the equipment, causing expansion and resulting in cracks or damages. This can compromise the efficiency of the system and lead to costly repairs or replacements. Remember, winter might be tough, but with the right preparation, so is your earth filter system. If you have any questions, feel free to contact your local Great Escape team!
- How to Properly Winterize Your Pump & Sand Filter
As winter approaches, our attention shifts to ensuring our pool equipment is safely stored and prepared for the colder months. Leaving water in your sand filtration system might lead to cracks, affecting its performance next season. This guide will show you how to protect your sand filter system from winter’s challenges. Key Takeaways: Draining every drop of water from your pool equipment is paramount. Properly winterize the sand filter to prevent freeze damage. Store the equipment safely, especially considering the weight of filled sand filters. Step-by-Step Process: After ensuring that your pool is winterized, start by disconnecting the hoses from the skimmer, return, and all related fittings of the pump and filter. Open the drain cap at the sand tank’s bottom and allow the water to drain out. For storage, leave this drain cap off. Rotate the valve on the top of the sand filter to the “WINTERIZE” position. This ensures your sand filter is ready for the winter. Start by removing the 2 screws securing the pump to its base. Use a flat-head screwdriver to take out the drain plug located at the pump strainer housing’s bottom. Take off the pump’s lid and tilt the pump to drain all remaining water. Using a cloth, wipe down every component of the pump and filter system, ensuring no water remains. It's wise to store hose clamps and small plugs inside the pump strainer housing for easy access next season. Sand filters, when filled, can be hefty. While the winterizing process generally offers protection, it's advised to use two adults or a special lifting device to move the system. Store in a location away from winter elements to maximize protection. FAQs: Q1: Why is it crucial to drain the sand filter system? A: Water left in the system can freeze, expand, and cause cracks, which affect the system's performance. Q2: Do I need to replace the drain cap during storage? A: No, keep the drain cap off during storage. Q3: Why is there a “WINTERIZE” position on the valve? A: This position ensures that the internals of the filter are set to best handle and prevent potential winter damages. Q4: Do I need to remove the sand from the filter before storing? A: No, you do not need to remove the sand from the filter before storing. Q5: How should I handle the weight of a filled sand filter during storage? A: With care. Consider using two adults or a specific lifting device to safely move and store it. Q6. What are some general signs that indicate my filtration system wasn't winterized properly? A: Visible cracks, water leakage during startup, and decreased filtration efficiency can all hint at potential winter damage. Regular checks and preventive winterizing can help avoid these issues. If you have any questions about winterizing your sand filter or pump, feel free to contact your local Great Escape team!
- Spa Start Up with Frog @Ease and WATER TRENDS
Congratulations! You've just taken a leap into the world of ultimate relaxation with your Jacuzzi or Sundance hot tub from the Great Escape. Let's navigate the setup journey using the Frog @Ease cartridge system and WATER TRENDS chemicals. Your end destination? Perfectly balanced water for a tranquil at-home spa retreat. Key Highlights: The magic of balanced water for unparalleled spa relaxation. The power of Frog @Ease to customize your sanitization. Expert guidance for setting up your Jacuzzi or Sundance hot tub. Step-by-Step Guide: Start by having a certified electrician handle the wiring for a seamless experience. Using a garden hose, fill your spa via the filter area. Remember to use a pre-filter if your water source is hard. It's time to energize your spa. Flip the breaker and watch it come alive. With FROG @Ease Test Strips in hand, check the water’s alkalinity and pH. Adjust accordingly, ensuring the alkalinity is in check first. Any questions? The Great Escape is your go-to guide. Toss in the Frog Jump Start pouch. Marvel as it effervesces, getting to work on 600 gallons of water with a single pouch. Install the cartridges tailored for Jacuzzi and Sundance hot tubs. Introduce the blue mineral cartridge first, followed by the SmartChlor sanitizer cartridge. Let your hot tub run for a filtration cycle, then check the water with a focus on Smart Chlor. Spot a residue at the waterline? A simple wipe is all it takes. FAQs: Q1: Why is it recommended to fill the spa through the filter area? A: Filling the spa through the filter area, especially after removing the cartridge filters, helps limit the formation of air pockets in the filtration system, ensuring a smoother filling process. Q2: How important is it to balance the water's alkalinity before adjusting the pH levels? A: Balancing the water's alkalinity is crucial. If the alkalinity isn't properly adjusted, the pH levels cannot be correctly modified. Imbalanced alkalinity can also affect the effectiveness of other chemicals. Q3: What's the significance of the blue mineral cartridge and the SmartChlor sanitizer cartridge in the Frog @Ease system? A: The blue mineral cartridge and the SmartChlor sanitizer cartridge work in tandem in the Frog @Ease system. The blue mineral cartridge, set to a dial of 7, provides essential minerals for the spa. The SmartChlor sanitizer cartridge maintains an optimal low chlorine level, ensuring the pH remains between 7.2 and 7.8. Together, they offer cleaner, clearer, and softer water. Q4: What should one do if they notice a residue at the waterline after the initial chemical treatment? A: If residue appears at the waterline within 48 hours post initial treatment, it's a normal occurrence. This residue can be easily and gently removed using a soft towel. Q5: What steps should be taken if the FROG @Ease Test Strips indicate extremely high alkalinity? A: In cases of extremely high alkalinity, it's essential to consult professionals. Reach out to your local Great Escape team, who will provide guidance on alternative solutions to rebalance the water's alkalinity. Remember, maintaining a balanced spa is not just about ensuring optimal performance but also about securing a comfortable and enjoyable experience for its users. Any questions during the setup process? Your local Great Escape team is eager to assist and ensure your spa moments are nothing less than perfection.
- Common Pool Problems and How to Fix Them
Maintaining a pool can be a rewarding experience, but it often comes with its share of challenges. From murky water to equipment malfunctions, pool owners frequently encounter issues that can detract from their enjoyment. Understanding these common pool problems and knowing how to address them can save you time, money, and frustration. In this post, we will explore some of the most prevalent pool issues and provide practical solutions to keep your swimming oasis in top shape. Understanding Common Pool Problems Before diving into solutions, it's essential to identify the common problems pool owners face. Here are some of the most frequent issues: 1. Cloudy Water Cloudy water is one of the most common complaints among pool owners. It can be caused by several factors, including: Poor filtration: If your filter is not working correctly, it won't remove debris and contaminants effectively. Chemical imbalance: High levels of chlorine or pH can lead to cloudy water. Algae growth: Even a small amount of algae can cloud your pool water. 2. Algae Blooms Algae can quickly turn a beautiful pool into a green mess. There are several types of algae, including green, yellow, and black algae. Each type requires a different approach to treatment. 3. Equipment Malfunctions Pool equipment, such as pumps, filters, and heaters, can malfunction due to wear and tear or improper maintenance. Common issues include: Pump failure: A malfunctioning pump can lead to poor circulation and water quality. Filter issues: Clogged or damaged filters can reduce efficiency. Heater problems: A broken heater can leave your pool too cold for comfortable swimming. 4. High Chlorine Levels While chlorine is essential for keeping your pool clean, too much can lead to skin irritation, eye discomfort, and unpleasant odors. 5. Stains on Pool Surfaces Stains can develop on pool surfaces due to various factors, including metal buildup, organic matter, or chemical imbalances. Solutions to Common Pool Problems Now that we've identified the common problems, let's explore effective solutions for each. Fixing Cloudy Water To clear up cloudy water, follow these steps: Check and Clean the Filter: Ensure your filter is clean and functioning correctly. Backwash or replace the filter media as needed. Balance Chemicals: Test your water chemistry using a pool testing kit. Adjust pH, alkalinity, and chlorine levels to the recommended ranges. Shock the Pool: If the water remains cloudy, consider shocking the pool with a chlorine shock treatment to eliminate contaminants. Tackling Algae Blooms To combat algae growth, take the following actions: Brush and Vacuum: Brush the walls and floor of the pool to dislodge algae, then vacuum it up. Shock the Pool: Use a high dose of chlorine to kill the algae. Follow the manufacturer's instructions for the correct dosage. Use Algaecide: After shocking, apply an algaecide to prevent future growth. Addressing Equipment Malfunctions To keep your pool equipment running smoothly: Regular Maintenance: Schedule regular maintenance checks for your pump, filter, and heater. Clean or replace parts as necessary. Monitor Performance: Pay attention to any unusual noises or changes in performance. Address issues promptly to avoid costly repairs. Managing High Chlorine Levels If you find your chlorine levels are too high, take these steps: Dilute the Water: If possible, partially drain the pool and refill it with fresh water to lower chlorine concentration. Use a Chlorine Neutralizer: Apply a chlorine neutralizer according to the product instructions to bring levels back to normal. Removing Stains from Pool Surfaces To remove stains from your pool surfaces, consider the following methods: Identify the Stain Type: Determine whether the stain is organic (like leaves) or inorganic (like metal). Use the Right Cleaner: For organic stains, use a pool shock treatment. For metal stains, a metal sequestrant can help. Brush and Scrub: Use a pool brush to scrub the stained areas gently. Preventative Measures for Pool Maintenance Preventing problems is often easier than fixing them. Here are some tips to keep your pool in excellent condition: Regular Water Testing Test your pool water at least once a week to ensure proper chemical balance. This will help you catch any imbalances before they become significant issues. Consistent Cleaning Regularly clean your pool by skimming debris, brushing walls, and vacuuming the floor. This will help maintain water clarity and prevent algae growth. Equipment Checks Inspect your pool equipment regularly for signs of wear and tear. Replace or repair parts as needed to keep everything functioning correctly. Cover Your Pool Using a pool cover when the pool is not in use can help keep debris out and reduce the need for cleaning. Conclusion Maintaining a pool requires diligence and attention to detail, but understanding common problems and their solutions can make the process much easier. By regularly testing your water, cleaning your pool, and addressing issues promptly, you can enjoy a sparkling clean swimming oasis all season long. Remember, a little preventive maintenance goes a long way in keeping your pool in top shape. So, take action today and ensure your pool remains a source of joy and relaxation for you and your family.
- Essential Pool Maintenance Tips for Every Homeowner
Owning a pool can be a delightful experience, offering a refreshing escape during hot summer days and a perfect spot for family gatherings. However, maintaining a pool requires diligence and knowledge to ensure it remains clean, safe, and enjoyable. This guide will provide essential pool maintenance tips that every homeowner should know, helping you keep your pool in top shape throughout the year. Understanding Your Pool Before diving into maintenance tips, it's crucial to understand the type of pool you have. There are primarily three types of pools: in-ground, above-ground, and inflatable. Each type has its unique maintenance requirements. In-Ground Pools In-ground pools are typically made of concrete, fiberglass, or vinyl. They require more extensive maintenance due to their permanent structure. Regular cleaning, chemical balancing, and equipment checks are essential. Above-Ground Pools Above-ground pools are easier to maintain and often more affordable. They still require regular upkeep, including cleaning and chemical balancing, but the tasks are generally less intensive than for in-ground pools. Inflatable Pools Inflatable pools are the easiest to maintain but also the most temporary. They require regular cleaning and chemical checks, but the setup and takedown process can be more labor-intensive. Regular Cleaning Cleaning your pool is the foundation of good maintenance. Here are some key cleaning tasks to incorporate into your routine: Skimming and Vacuuming Skim the Surface: Use a skimmer net to remove leaves, bugs, and debris from the water's surface. This should be done daily, especially during the fall when leaves are abundant. Vacuum the Bottom: Use a pool vacuum to clean the bottom of the pool weekly. This helps remove dirt and algae that settle at the bottom. Brushing the Walls Brush the walls and tiles of your pool weekly to prevent algae buildup. Pay special attention to corners and steps where dirt tends to accumulate. Cleaning the Filter Your pool's filter plays a crucial role in maintaining water clarity. Clean or replace the filter as needed, typically every 4-6 weeks. A clean filter ensures efficient water circulation and reduces the need for chemical treatments. Chemical Balancing Maintaining the right chemical balance in your pool is vital for both safety and comfort. Here are the key chemicals to monitor: pH Levels The ideal pH level for pool water is between 7.2 and 7.8. Test the water weekly and adjust as necessary using pH increasers or decreasers. Chlorine Levels Chlorine keeps your pool water sanitized. Aim for a chlorine level of 1-3 ppm (parts per million). Use chlorine tablets or liquid chlorine to maintain these levels. Alkalinity and Calcium Hardness Alkalinity: Keep total alkalinity between 80-120 ppm to stabilize pH levels. Calcium Hardness: Maintain calcium hardness between 200-400 ppm to prevent corrosion of pool surfaces and equipment. Equipment Maintenance Regular maintenance of your pool equipment is essential for longevity and efficiency. Here are some tips: Pump and Filter Check your pump and filter regularly for any signs of wear or damage. Clean the pump basket and ensure the filter is functioning correctly. If you notice any issues, consult a professional. Heater If you have a pool heater, inspect it at the beginning of each season. Clean the heating elements and check for any leaks or corrosion. Automatic Cleaners If you use an automatic pool cleaner, ensure it is functioning properly. Check the hoses for cracks and clean the filter regularly to maintain efficiency. Seasonal Maintenance Seasonal changes can impact your pool's maintenance needs. Here’s how to prepare for each season: Spring Open Your Pool: Remove the cover and clean the pool thoroughly. Check the water chemistry and adjust as needed. Inspect Equipment: Check all equipment for any damage that may have occurred during the winter months. Summer Regular Cleaning: Increase your cleaning frequency during the summer when the pool is in use more often. Monitor Chemical Levels: Heat can affect chemical levels, so test the water more frequently. Fall Prepare for Winter: As temperatures drop, start preparing your pool for winter. Clean the pool and balance the chemicals before closing it. Cover the Pool: Invest in a good quality pool cover to protect it from debris and harsh weather. Winter Winterize Your Pool: If you live in a colder climate, winterizing your pool is essential. Drain the water, add antifreeze to the plumbing, and cover the pool securely. Troubleshooting Common Issues Even with regular maintenance, issues can arise. Here are some common problems and solutions: Cloudy Water Cloudy water can be caused by several factors, including improper chemical balance or inadequate filtration. Test the water and adjust the chemicals as needed. If the problem persists, check the filter and clean it. Algae Growth Algae can quickly take over a pool if not addressed. Shock the pool with chlorine and brush the walls to remove algae. Regularly maintaining chemical levels can help prevent this issue. Leaks If you notice a drop in water levels, check for leaks. Inspect the pool liner, skimmer, and plumbing for any signs of damage. If you cannot locate the leak, consider hiring a professional. Safety Considerations Safety should always be a priority when it comes to pool maintenance. Here are some tips to keep your pool area safe: Install a Pool Fence A pool fence is essential for preventing accidents, especially if you have children or pets. Ensure the fence is at least four feet high and has a self-closing gate. Keep Safety Equipment Handy Always have safety equipment, such as life rings and a first aid kit, readily available near the pool area. Educate Family Members Ensure everyone in your household knows basic pool safety rules, including never swimming alone and understanding the importance of supervision. Conclusion Maintaining a pool may seem daunting, but with regular cleaning, chemical balancing, and equipment checks, you can enjoy a safe and inviting swimming environment. By following these essential pool maintenance tips, you’ll ensure your pool remains a source of joy for years to come. Remember, a well-maintained pool not only enhances your home’s value but also provides countless hours of fun for family and friends. Start implementing these tips today and dive into a summer of enjoyment!