Search this site
121 results found with an empty search
- How to Attach a Backwash Hose
In this guide, you'll learn everything you need to know about using a backwash hose for draining water further away from your pool. Follow the steps outlined in the video to ensure a secure attachment and proper use. By using a backwash hose, you'll have a convenient and effective solution for managing water drainage during pool maintenance and avoid messes. Let's dive in! Key Takeaways: A backwash hose is a flexible plastic hose that allows you to drain water further away from your pool, preventing potential messes. It comes in various lengths, such as 25, 50, and 100 ft. Before attaching the backwash hose to the waste port of your filter, ensure that the shut-off valves are in the correct position to stop the water flow from both the skimmer and return side. Wrap a filter fitting with Teflon tape to create a better seal. Slide a hose clamp over the waste port, thread the fitting into the filter's waste port, and attach the backwash hose. Tighten the clamp to ensure the hose remains securely attached. Step-by-Step Process: Turn off the shut-off valves to stop the water flow from both the skimmer and return side. If you don't have shut-off valves, use a Hayward 1022 black cap or rags to stop the water from pouring out while you remove the pump basket. Wrap a filter fitting with Teflon tape to create a better seal. Slide a hose clamp over the waste port, allowing it to hang loosely. Thread the fitting into the filter's waste port. Attach the backwash hose to the fitting and tighten the clamp to prevent the hose from slipping off. Your backwash hose is now ready to use for draining water further away from the pool. FAQs: Q1: Why should I use a backwash hose instead of draining water directly from the pool? A: Using a backwash hose allows you to drain water further away from the pool, preventing potential messes near the pool area. It provides a more convenient and controlled drainage solution. Q2: How do I stop the water flow if I don't have shut-off valves? A: If you don't have shut-off valves, you can use a Hayward 1022 black cap or rags to stop the water from pouring out while you remove the pump basket. Q3: How do I create a secure seal when attaching the backwash hose? A: Wrap a filter fitting with Teflon tape to create a better seal. Slide a hose clamp over the waste port, thread the fitting into the filter's waste port, and attach the backwash hose. Tighten the clamp to ensure a secure attachment. Q4: Can I use any length of backwash hose? A: Backwash hoses are available in various lengths, such as 25, 50, and 100 ft. Choose a length that suits your specific needs and allows you to drain water further away from the pool. If you have any questions or need further assistance, reach out to your local Great Escape team. We're always happy to help!
- Securing Your Hose with a Clamp: A Practical Guide
During a busy pool season, the pressure buildup in water circulation equipment can loosen hoses, leading to water loss and equipment malfunctions. Learn how to ensure proper hose placement using clamps with our easy-to-follow steps. Key Takeaways: With high pressure buildup in the water circulation equipment, hoses can become dislodged, leading to water loss and equipment issues. Attaching clamps helps secure the hoses and prevent these issues. Properly installing a hose clamp involves sliding it onto the hose cuff, connecting the hose to the fitting, and tightening the clamp using a flat head screwdriver. While ensuring the clamp is securely attached, care should be taken not to over tighten it, as this could potentially damage the hose or the clamp. Step-by-Step Process: Start by sliding the clamp onto the end of the hose (also known as the cuff). Connect the hose to the fitting, allowing the clamp ring to fit loosely over it. Slide the clamp to the middle of the cuff. Tighten the screw located on the top of the clamp using a flat head screwdriver. Avoid over tightening to prevent potential damage. With these steps, your clamp and hose should now be properly installed! Resources Mentioned: Hose Clamp: An essential tool in pool maintenance to secure hose placement, preventing water loss and equipment issues due to high-pressure buildup in water circulation equipment. Flat Head Screwdriver: A handy tool used to tighten the screw on the clamp to ensure the hose is properly secured. FAQs: Q1: Why is it important to secure a hose clamp during pool maintenance? A: Securing a hose clamp is crucial to prevent hoses from getting loose due to pressure buildup in the water circulation equipment, which can cause water loss and equipment issues. Q2: How do I properly install a hose clamp? A: Slide the clamp onto the hose cuff, connect the hose to the fitting, and then tighten the screw on the clamp using a flat head screwdriver. Be careful not to overtighten the screw. Q3: Can I over tighten the hose clamp? A: Over tightening the hose clamp can potentially cause damage to the hose or the clamp itself, so it's essential to tighten it just enough to secure the hose. For any questions about attaching and securing a hose clamp, you can reach out to your local Great Escape team. We're always happy to help!
- Hose Replacement Simplified: Your Essential Guide
With different hose lengths and diameters to choose from, our step-by-step guide will make the process a breeze. From measuring the correct hose length to proper installation, this guide has you covered. Key Takeaways: Most pool connections require a hose with 6 ft length and 1 1/2” diameter. However, it's best to measure the distance between your equipment pieces to determine the right hose length. Shutting off water flow from both the skimmer and return side is crucial before beginning. If you don’t have shut off valves, use a Hayward 1022 black cap or rags to prevent water from pouring out. Attach the new hose by sliding the clamp over the hose cuff, connecting it to the fitting, and tightening the clamp. Be cautious not to overtighten the clamp. Step-by-Step Process: Measure the distance between your equipment pieces to determine the right hose length needed. Turn the shut off valve handles to the side so that the water flow is stopped from both the skimmer and return side. If you don’t have shut off valves, use a Hayward 1022 black cap or rags to stop the water from pouring out when the hoses are removed. Loosen the clamps on both ends of the hose for easy removal. Slide the hose clamp over the cuff of the new hose and connect the hose to the fitting, letting the ring fit loosely over it. Slide the clamp to the middle of the cuff and tighten the screw located on the top of the clamp using a flat head screwdriver. Remember, avoid overtightening. Repeat this process on the opposite end of the hose to complete a secure connection. Resources Mentioned: Pool Hoses: These come in various lengths and diameters, making it easy to adjust and replace. They are crucial components in pool filtration systems. Hose Clamp: An essential tool in pool maintenance to secure hose placement, preventing water loss and equipment issues due to high-pressure buildup in water circulation equipment. Hayward 1022 Black Cap: This is a helpful tool used to stop water flow if you don’t have shut off valves. Flat Head Screwdriver: A key tool used to tighten the screw on the clamp, securing the hose in place. FAQs: Q1: What length and diameter should my pool hose be? A: Typically, most pool connections take a 6 ft long x 1½” diameter hose. However, measuring the distance between your equipment pieces will help determine the precise hose length you need. Q2: How do I stop the water flow when replacing a hose? A: If you don’t have shut off valves, you can use a Hayward 1022 black cap or rags to prevent water from pouring out when the hoses are removed. Q3: Can I overtighten the hose clamp? A: Overtightening the hose clamp can potentially cause damage to the hose or the clamp, so it's crucial to tighten it just enough to secure the hose. Q4: How do I know if I have installed the new hose correctly? A: If you have followed the steps correctly, your hose should be securely connected on both ends with tightened clamps. For any questions about hose replacement, feel free to reach out to your local Great Escape team. We're always happy to help!
- Pump Perfection: Replacing Your Pool Pump Lid O-Ring
Elevate your pool's performance with our essential guide to replacing the pump O-ring. A properly secured O-ring under the clear pump lid ensures an air-tight seal, crucial for optimal pump function. Equipped with a flathead screwdriver and Jack’s Formula Multilube, we'll walk you through the steps to maintain your pool pump's efficiency. Key Takeaways: Recognize the critical role of the pump O-ring in maintaining an effective, air-tight seal for your pool's filtration system. Gather your tools and halt water flow using shut off valves or alternative methods for a smooth O-ring replacement. Discover why Jack’s Formula Multilube is the top choice for ensuring the longevity and reliability of your pool equipment. Step-by-Step Process: Utilize shut off valves or a Hayward 1022 black cap to cease water flow to the pump. Depress and turn the clear lid atop the pump’s strainer basket to access the O-ring. Carefully remove the old O-ring, apply Jack’s Formula Multilube to the new ring for an enhanced seal, and position it in the lid's groove. Secure the clear lid back on the pump, ensuring the new O-ring is properly set. Resources: Jack’s Formula Multilube: A specially formulated lubricant designed to protect and enhance the seal of O-rings in pool equipment. Hayward 1022 Black Cap: An effective solution for halting water flow in the absence of shut off valves. Replacement Pump O-Ring: Use to maintain a tight seal in your pump. FAQs: Q1: How do I know if my pump O-ring needs replacement? A: Look for signs of wear, leaks, or a decrease in pump efficiency as indicators. Q2: Can I use any lubricant on the O-ring? A: We recommend Jack’s Formula Multilube for its compatibility with pool equipment O-rings. Q3: What's the best way to remove the old O-ring? A: Gently pinch and pull with your fingers or use a flathead screwdriver for additional leverage. Q4: Why is an air-tight seal important for the pump? A: It prevents air leaks, ensuring the pump maintains proper suction and filtration efficiency. Q5: Who should I contact if I encounter difficulties? A: The Great Escape team is always ready to assist with your pool maintenance questions. Keeping your pool pump in top condition is key to a clean and enjoyable swimming experience. For further support or inquiries, your local Great Escape team is here to help.
- The Proper Way to Clean Your Pool's Pump Basket
The pump basket plays the role of a guardian, capturing larger debris and preventing it from causing chaos in your pump. But like any good guardian, it needs a little upkeep. We'll walk you through the straightforward process of keeping your pump basket clean and effective. Key Takeaways: Make it a habit to check your pump basket after big pool parties, significant storms, or every few weeks to avoid potential issues. Ensure water flow is stopped from both the skimmer and return sides before you start the cleaning process. A clean pump basket ensures that water flows seamlessly through your pool's circulation system. Step-by-Step Process: Turn your shut off valves to the proper position to stop water flow from both the skimmer and return sides. If you don’t have shut off valves, use a Hayward 1022 black cap or rags to stop the water from pouring out while you remove the pump basket. Remove the clear lid that sits directly on top of the pump’s strainer basket by pushing down on the lid and turning the handle. Remove the basket and clean out all the debris caught inside. Place the cleaned basket back inside the strainer housing and tighten the clear lid. FAQs: Q1: How often should I clean my pool's pump basket? A: Aim to check it after big pool parties, significant storms, or at least every few weeks. Q2: Do I need a special tool to remove the pump basket lid? A: Typically, no special tools are needed. Most lids are designed to be opened by hand. Q3: Can I run my pool pump without the basket in place? A: No, running the pump without the basket can allow debris to clog the pump and damage the impeller. Q4: What should I do if my clear lid is too tight to remove? A: Be cautious not to force it. Apply a lid lubricant or contact a professional to avoid causing damage. Q5: Can a damaged pump basket affect my pool’s water quality? A: Yes, a damaged or clogged basket can reduce the efficiency of your pool’s circulation, affecting water clarity and quality. At The Great Escape, we’re dedicated to making pool maintenance as smooth and straightforward as your pool’s water should be. For more expert advice on keeping your pool in perfect shape, remember, we're always here to dive in and help.
- Bump, Flush & Re-coat: Give Your Earth Filter a Fresh Start
When your earth filter pressure climbs quickly or dirty water returns to the pool after regeneration, it may be time for a thorough cleaning. In this tutorial, The Great Escape walks you through how to clean and flush your earth filter, restore water flow, and re-coat the filter with fresh earth for proper filtration. Key Takeaways: Clean your earth filter when pressure rises more than 10 psi within 24 hours or less, or when cloudy or dirty water returns to the pool for more than 30 seconds after regeneration. Proper cleaning involves bumping the filter, draining and flushing the system, then repeating the procedure for the best results. Record your pressure gauge reading after adding fresh earth. This precoat pressure gives you a baseline for determining when the filter needs future regeneration or cleaning. Step-by-Step Process: Turn off the pump and use your shut-off valves to stop water flow from the skimmer and return. If you don’t have shut-off valves, use a Hayward 1022 black cap or rags to prevent water from entering the filtration system. Move the bump handle down slowly and then up briskly. Repeat this process 8 times. Open the vent valve beneath the bump cover and open the filter drain. Allow the water and dirt to drain completely. As the water flow begins to slow, open the shut-off valves to thoroughly flush the system. Close the filter drain and vent valve. Return the shut-off valves to the open position, turn on the pump, and allow the tank to fill with water. Repeat the cleaning procedure for the best results. Once the filter is clean and you see a steady flow of water returning to the pool, prepare to re-coat the filter with earth. Add 4 lbs. of earth into the skimmer as quickly as the plumbing will accept it. If you don’t have a measuring scoop, 44 oz. or 5½ cups equals 1 lb. Note and record the pressure gauge reading after adding the earth. This is your precoat pressure and provides a reference for future filter maintenance. Resources & Explanations: Bump Handle — Used during cleaning to help release accumulated material from the filter before draining and flushing. Vent Valve & Filter Drain — Allow water and collected dirt to leave the filter during the cleaning process. Filter Earth — Recoats the filter after cleaning so it is ready to resume proper filtration; this procedure calls for 4 lbs. Pressure Gauge — Recording the pressure after recoating establishes your precoat pressure, giving you a useful baseline for knowing when the filter needs attention again. FAQs: Q1: When should I clean my earth filter? A: Clean the filter if the pressure gauge rises more than 10 psi within 24 hours or less, or if cloudy or dirty water shoots back into the pool for more than 30 seconds after regeneration. Q2: How many times should I move the bump handle? A: Move the handle down slowly and up briskly 8 times as part of the cleaning procedure. Q3: Why should I repeat the cleaning procedure? A: Repeating the process helps thoroughly flush the filter before fresh earth is added. Q4: How much earth should I add after cleaning? A: This procedure calls for 4 lbs. of earth added through the skimmer. If you don’t have a measuring scoop, the script uses 44 oz. or 5½ cups as the equivalent of 1 lb. Q5: Why should I record the pressure after adding the earth? A: That reading becomes your precoat pressure. Keeping it on hand gives you a baseline for judging when the filter needs to be regenerated or cleaned again. A properly cleaned and recoated earth filter helps keep water moving steadily through your pool’s filtration system. At The Great Escape, we want to give you the know-how to confidently care for your pool equipment and get the most from your backyard investment. If you have questions about your earth filter or filtration system, reach out to your local Great Escape team. We’re happy to help!
- Patch it Up: Your Quick Guide to Fixing Pool Liners
Think of your pool liner as your car's tire. It might last a decade without a hitch, or, like a tire meeting a sharp object on the road, it could puncture unexpectedly. But here's the good news: you don’t need to drain your pool or call in the professionals when you discover a hole or tear. We'll walk you through a simple process using an underwater patch kit. You’ll have that liner looking (and working) like new in no time! Key Takeaways: Cut a patch that is twice the size of the original hole or tear for effective coverage. Carefully unfold the patch underwater and place it smoothly over the damage. For extra peace of mind, repeat the process with a second patch over the first. Step-by-Step Process: Cut a piece of patch material that is twice the size of the original hole or tear. Evenly spread the underwater cement glue on one side of the patch. Gently fold the patch and submerge it underwater. As you approach the damaged area, carefully unfold the patch and place it over the hole or tear. Firmly hold the patch in place by applying pressure for 2-3 minutes. For extra security, repeat steps 1-4 using a patch that is twice the size of the original patch. Apply pressure for 3-5 minutes to secure. FAQs: Q1: How big should the patch be? A: Cut the patch to be twice the size of the original hole or tear. Q2: Can I apply the patch above water? A: The patch should be applied underwater to ensure it adheres properly to the wet liner. Q3: How long do I need to apply pressure to the patch? A: Apply pressure for 2-3 minutes for the first patch, and 3-5 minutes if you are applying a second patch. Q4: Do I need to drain my pool before patching the liner? A: No, the patch can be applied underwater, so draining the pool isn’t necessary. Q5: What should I do if the patch isn’t sticking? A: Make sure the patch and adhesive are applied as per the instructions. If problems persist, reach out to a professional. If you encounter any issues or have any questions, don't hesitate to reach out to your local Great Escape team. We are here to help make your pool maintenance as smooth as possible.
- No More Drips: How to Replace Your Voyager Drain Cap
Learn how to replace the black drain cap on your Hayward Voyager cartridge filter in just a few easy steps. Whether you’re doing seasonal maintenance or fixing a small leak, this tutorial will help you get the job done quickly and correctly. Key Takeaways: Always stop water flow and release pressure before starting. Use the Hayward seat removal tool for tough caps. Ensuring a tight seal prevents leaks and keeps your system running smoothly. Step-by-Step Process: Stop water flow using shut-off valves or Hayward black plugs. Open the air relief valve to release built-up pressure. Turn the old drain cap counterclockwise to remove. If stuck, use the Hayward seat removal tool. Install the new drain cap by turning it clockwise until fully tightened. Resources and Explanations: Hayward Black Drain Cap: Seals the base of the filter and prevents leaks during operation. Shut-Off Valves or Hayward Plugs: Essential to block water flow before working on the system. Air Relief Valve: Safely releases built-up air pressure inside the filter tank. Hayward Seat Removal Tool: Handy for loosening tight or stuck fittings safely. FAQs: Q1: Do I need to fully drain the filter before replacing the cap? A: No, but you must stop water flow and release pressure to prevent water loss and injury. Q2: What if I can’t turn the drain cap by hand? A: Use the Hayward seat removal tool for a safe and easy removal. Q3: How tight should the new cap be? A: Hand-tightened until snug is usually sufficient to ensure a good seal. At The Great Escape, we’re here to help you get the most out of your pool equipment with easy, effective tutorials. If you have questions, reach out to your local Great Escape store—we’re always happy to help!
- Under Pressure? Swap That Gauge on Your Voyager
Is your Hayward Voyager filter not giving you the right pressure readings? A faulty gauge can compromise your system’s efficiency—but don’t worry, replacing it is quick and easy. In this video, we’ll show you how to remove and install a new pressure gauge so you can keep your pool system performing at its best. Key Takeaways: Learn how to safely shut off water flow before opening your filter system. Discover the proper technique for removing and installing a pressure gauge. Ensure your new gauge is leak-free with the right use of Teflon tape. Step-by-Step Process: Turn off water flow using shut-off valves or Hayward black plugs in the skimmer and return lines. Open the air relief valve to release internal pressure. Loosen the black ring on the filter tank and drain the water. Remove the lid and unscrew the old pressure gauge from the adapter fitting. Apply Teflon tape to the new gauge and install it into the fitting. Reinsert the gauge into the lid and secure it with the wing nut. Reinstall the tank lid and black ring, then close the drain cap. Resources and Explanations: Hayward black plugs: Used to block water manually when shut-off valves are unavailable Air relief valve: Releases internal pressure for safe opening of the filter Teflon tape: Ensures leak-proof installation of threaded parts Wing nut & adapter fitting: Components that secure the pressure gauge into the lid assembly FAQs: Q1: Why does my pressure gauge stop working? A: Over time, exposure to heat, chemicals, or water intrusion can damage the internal components, causing inaccurate readings or total failure. Q2: Can I use any pressure gauge, or does it need to be Hayward specific? A: While many gauges are universal, it’s best to use a gauge compatible with Hayward cartridge filters to ensure proper fit and performance. Q3: How often should I check or replace my pressure gauge? A: It’s a good idea to check it at the start of each pool season or whenever readings seem off. Replace it if it's cracked, foggy, or non-responsive. Q4: Do I need to drain the entire filter tank to replace the gauge? A: Yes, draining the tank is necessary to safely access and remove the lid and internal components. Q5: What’s the correct pressure range for a clean filter? A: This can vary, but most systems run between 10–20 psi. Refer to your filter’s manual for the ideal range specific to your setup. If you ever need help, your local Great Escape team is just a call or visit away. We're here to help you get the most out of your home leisure investment with easy-to-follow guidance and unmatched customer support.
- Lock It Down: Swapping Tabs on Your Hayward Voyager
Got a loose filter lid or worn-out locking tabs? In this quick tutorial, we’ll walk you through the simple steps to replace the locking tabs on your Hayward Voyager cartridge filter—keeping your system sealed and secure for smooth pool operation. Key Takeaways: Replacing locking tabs prevents leaks and ensures a tight seal. This simple repair requires only a flathead screwdriver. Shutting off water flow and releasing pressure is essential before disassembly. Step-by-Step Process: Stop water flow using shut-off valves or black plugs in the skimmer and return. Open the air relief valve to release pressure. Loosen the black ring by holding the tabs and turning it counterclockwise. Unscrew the drain plug and fully drain the tank. Remove the black ring and pop out the old locking tabs. Snap new tabs into place, align and press gently. Reassemble the tank lid and tighten the ring by hand. Resources and Explanations: Locking Tabs – Help secure the filter lid for proper operation. Hayward Black Plugs – Used to block water flow manually during repairs. Flathead Screwdriver – The only tool required to remove and install tabs. Drain Plug – Allows safe draining of the filter tank during maintenance. FAQs: Q1: Do I need to turn off the pump before starting? A: Yes, always shut off the pump before performing any maintenance. Q2: Can I reuse old locking tabs? A: No, worn or damaged tabs should be replaced to maintain a tight seal. Q3: What if I don’t have shut-off valves? A: Use Hayward black plugs in the skimmer and return to block water manually. Reach out to your local Great Escape team if you need any extra help. We’re always happy to help!
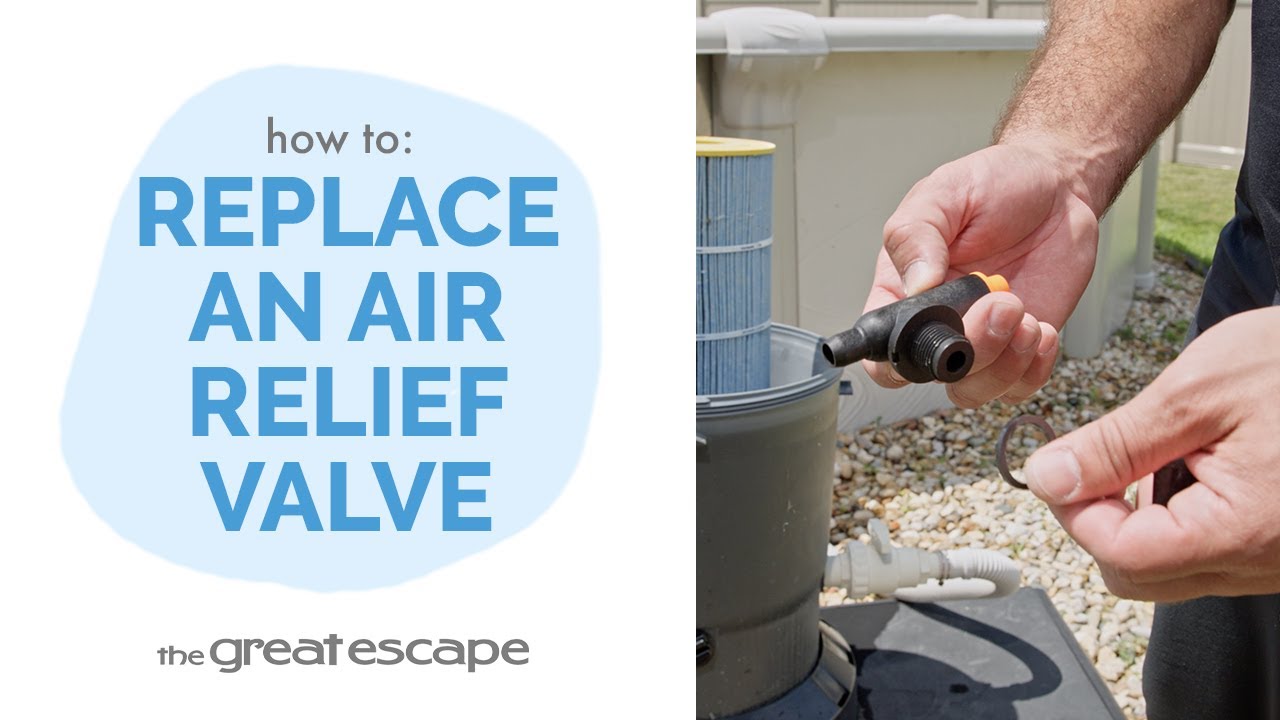
- Breathe Easy: How to Replace Your Voyager’s Air Relief Valve
If your Hayward Voyager filter is leaking from the top or not properly venting air, it might be time to replace the air relief valve. In this quick tutorial, we’ll walk you through the process of removing and installing a new air relief valve, so your filter system can operate smoothly and efficiently. Key Takeaways: Learn how to safely remove the existing air relief valve. Discover the proper alignment technique for installing a new valve. Understand when replacement is necessary to prevent system inefficiencies or leaks. Step-by-Step Process: Turn off your pump before starting. Remove the old air relief valve by turning it counterclockwise until it’s completely detached. Take your new air relief valve and begin to thread it into the filter lid by turning clockwise. Once it’s hand-tight, give it a firm but gentle final twist to ensure a secure fit. Turn the pump back on and check for leaks to confirm proper installation. Resources and Explanations: Hayward Air Relief Valve: Essential for releasing air pressure in the filter system and maintaining optimal performance. Pump Off Safety: Always ensure your system is off before making any adjustments to avoid injury or damage. Threaded Fit: A hand-tight plus a gentle extra twist is all that’s needed—no tools required. Leak Check: Important for confirming the replacement was successful and watertight. FAQs: Q1: How do I know my air relief valve needs replacement? A: If you notice consistent leaking or the valve no longer releases air properly, it’s likely worn out. Q2: Can I over-tighten the new valve? A: Yes—over-tightening may crack the valve or lid. Only tighten until snug and leak-free. Q3: Do I need plumber’s tape on the threads? A: Generally, no. Most Hayward air relief valves come with an O-ring seal that prevents leaking without tape. At The Great Escape, we’re here to help you enjoy your home leisure investments for years to come. If you have questions or need product support, don’t hesitate to contact your local store. We’re always happy to help!
- The Ultimate Guide to Cleaning Your Pool Cartridge Filter
Much like how a dedicated janitor keeps a building sparkling, your filter tirelessly traps debris and grime, ensuring every swim is a pleasure. But, like any hard worker, your filter needs a break – a good cleaning to keep it in peak condition. Learn the steps to refresh your cartridge filter and restore your pool’s sparkle with The Great Escape’s expert tips. Key Takeaways: Be aware of the telltale signal that your cartridge filter needs cleaning - weak water pressure from the return. Before you start, make sure to halt the water flow to avoid any messy surprises. For a profoundly dirty filter, a special cleaning solution like WATER TRENDS Filter Wash can work wonders. Step-by-Step Process: Turn shut off valves to stop water flow from both the skimmer and return sides. If you don't have shut off valves, use a Haywood 1022 black cap or rags to stop the water from pouring out. Unscrew the black cap at the bottom of the filter using your hands or a flathead screwdriver to drain trapped water. Push in the tabs under the handles on each side of the black ring and turn until the top of the filter loosens from the bottom. Lift and slide the cartridge out of the holder and spray it with a garden hose at medium to high pressure. For a deeper clean, apply WATER TRENDS Filter Wash and let it sit for 15 minutes, then rinse. Place the cleaned cartridge back into the filter housing with the embossed side facing upwards and center it. Replace and secure the filter top, aligning it with the bottom half. FAQs: Q1: How often should I clean my cartridge filter? A: Regular maintenance is key. Clean it when you notice weak water pressure from the return. Q2: Do I always need to use a chemical cleaner like WATER TRENDS Filter Wash? A: No, this is generally for filters with heavy grime. A high-pressure hose often does the job well. Q3: Can I run my pool pump while the filter is removed? A: No, running the pump without the filter can lead to damage and debris in the pool. Q4: What if the cartridge doesn't look clean after a hose down? A: In such cases, a chemical cleaner like WATER TRENDS Filter Wash is recommended. Q5: How tight should the filter top be when reassembling? A: Secure it firmly, but avoid over-tightening, which might make it hard to open later or cause damage. Swimming in a crystal-clear pool is one of life’s simple joys, and we're here to ensure it stays that way. At The Great Escape, we're passionate about offering solutions that make pool maintenance a breeze rather than a chore. If you need further assistance, contact your local Great Escape team. We're always happy to help!